Showing posts with label props. Show all posts

Wednesday, November 26, 2014

INKED, AT LAST

A short update...I've painted the tats and added the quills....and I LOVE it!!

Oh, and I've added teeth as well!

Monday, October 13, 2014

SKIN O' MY TEETH

Just a little photoshop to see if the idea of having tattoo on the right eye makes any sense at all...For the time being, I just adapted the albino predator tattoo design onto the mask... and photoshopped the teeth as well..

Friday, September 26, 2014

MORNING SICKNESS

Woke up a bit early today..Managed to do some progress to the mask and hands..My wife hates them..hahaha. I'm heading into the right direction.


Wednesday, August 27, 2014

HARGA BULU KAKI a.k.a THE PRICE OF THE HAIR OF MY LEGS

If I could shave off all the hair on my legs, how much are they worth? I'm not sure about my hair, but I sure know that the 'hair' (or quills) for a predator prop does cost at least a finger or two. So I decided to make them myself. But what's the cheapest way to do it, plus, how the fuck do you make 'em all bendy and flexy like the movies aside form the traditional silicone/latex cast? After some netsurfing time, I found out that there is a product out there that can do just that, without the hassle of a mold. Behold, Sculpey's Bake n Flex!

It's like your normal super sculpey clay, but it doesn't harden like a motherfucker after you bake them. Fuckin' A!!! Here's what I have right now..
Perfect! The only thing is, I got super busy right after that. I couldn't even catch a breath during the weekend. And I only managed to do some minor amendments to the biceps this morning..The arms looked a bit funny, and I know it has to be the biceps... So here's what I changed...plus I started to sculpt the forearm muscles as well...


Monday, August 18, 2014

WEEKEND WARRIOR

It's that time of the week again, kind people, last weekend I managed to do quite an amount of progress  to the muscle suit. I finished adding scales to the EVA foam skin..Bloody tedious work, but worth all the effort..after the scales are completed, I laid PVA glue all over it for the base coat of the paint later on..


Oh, by the way, did I mention that it's a fuckin' messy work as well?
After the PVA coating has dried off completely, I painted a coat of sand-ish yellow color (I used a cheap spray can, thin layers at a time) over the muscles.


..and because I'm such an impatient prick, I overdid the shadow accents. Bah! I'm gonna hafta redo the paintwork again after this.. But for now, I think I can safely try this on..


It fits!! But putting it on and taking it off again is a bitch! I think I need to add zippers to the back. The bio looks ok though..That's all for now...I need sleep....zzzzzzzzzzz....


Monday, August 4, 2014

CURVES

Hey fellas...Like I mentioned earlier, I felt that the bio helm was a bit too big, so I started with the muscle suit. Started off with a binding tape-dummy of myself and a cheap 20 bucks body hugging t-shirt.

I used 1/2 inch thick foam (I don't know the exact name of the foam, but it looked like the ones used in cheap matresses) to form the pectorals. I looked down right ugly and I almost gave up on this...

But thanks to the missus, I managed to pull myself together and continued on...

It looked better, although I have to say, cutting and carving the foam to shape is a bitch to do..

Now here's the tricky part, I'm going to cover the foam muscle with 1mm thk. EVA sheet. I learned this trick from my good friend Jeff of Wizart Studio...


Not too bad for a first timer, eh? 
Now I can see for sure whether the bio helm is too big of not...

Yup, it does looked tad too big compared to this:

Well, I guess I'mma hafta do a new bio helmet...


Friday, August 1, 2014

AN OLD FLAME

Greetings humans. It's time for another episode of "DO THE THINGS YOU LOVE AS MUCH AS POSSIBLE BEFORE YOU DIE". 
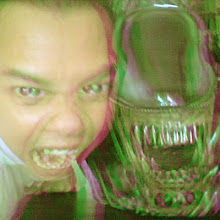
I had the pleasure of meeting a coupla Malaysian cosplayers who are into predators the other day, and they invited me to join their fb group, Malaysia Predator Clan. Wow! These guys are great! The amount of passion they put into their predator suits really amaze me. The group is small, but each of them has or in the process of making their own predator suit! HAH!! Cool, innit??!! It's like meeting up your long lost brother. 
So, being me, I ditched the TIE interceptor project (only for a while) and ...wait for it.......started my own Predator suit project...heheheh..
Here's a list of what I need to do to become an "ugly motherfucker", as arnold would say it:

  • make a bio helmet (no, I'm not gonna use the ones I've already have..where's the fun in that, right?)
  • make an undermask with dreads and teeth and all
  • make a muscle suit
  • make a set of armor and backpack and weapons to go with the muscle suit
  • wear the suit with pride
  • go kick some ass!
So that's the plan. First off, I wanted to become the Wolf Predator from AVP:R. He's just sooo damn badass! I already have a sideshow Wolf Predator Bio Helmet and a smaller Snyder Helmet, but still I decided to make another one just for the fun of it. 
I started off with a pep file that I found in the hunter's lair forum, a damn accurate pep file. Here's some progress pics :


And here's some comparison pics between the pep mask and the sideshow and snyder mask:


Not too bad, eh? Now that the easy part's done, we go to the dirty part; resin & fibreglass application..(the part I hate most)

...and more dirty work, bondo and sanding....dread..


....and filling the gaps....

....and lastly, texturing...cough cough..


After this stage, I began to feel restless due to the fact that the helmet seemed tad too big. And although this is not totally finished yet, I decided to start with the muscle suit. I will revisit the bio helm once I finish the suit so that I get the Idea of how big the helm should really be...


Saturday, September 15, 2012

THE PRIME TIME OF YOUR LIFE

Howdy folks! I've done some more sanding and bondo-ing to the helmet. So now I've gone and primed it with gloss black to see any imperfections left. And of course when the gloss enamel paint hits the surface, all of the nooks, crooks and chips came out like rats after rain.. here's some pics to show you just what I meant..


It's not 100 percent yet, but it's getting close, man...I'm getting the shivers..Well, that's all for now..Have a blessed life peeps!

Tuesday, September 4, 2012

HUMAN AFTER ALL

My hands are about to fall off...All those sanding during the weekend really gave me a total workout. It looked easier in the tutorials don't it? But the fact remains, sanding bondo is a pain in the ass. But, after everything is said and done, it was worth it. This is my third layer of bondo, and it never looked better. Just a coupla bit more and it will be ready for vacuform!


Second layer of bondo and sanding..
You can still see the jagged edges..


Third layer of bondo and sanding..
The visor area is much more refined..

Well, that's all for now. We still have a long way to go, but I'm happy to say, the work is getting along mighty fine...

Tuesday, August 14, 2012

HARDER, BETTER, FASTER, STRONGER

It's a bit late to wish my muslim brothers and sisters Ramadhan Mubarrak, but here's an early Eid Mubarrak! Here's some updates on the Guy-Manuel de Homem-Christo Helmet. 


Brushed the whole thing with resin (2 coats to be exact)...

Cut out pieces of fibreglass cloth...

..and applied them to the underside of the helmet, then applied more resin...

When the helmet became really hard, I applied the 2 part bondo or car cement onto the helmet. Started with the visor section...

Still a long way to go...Stay tuned for more WIPs soon...
Cheers!!

UNFINISHED BUSINESS

About Me

My photo
Kuala Lumpur, Malaysia
Wouldn't really call myself a proper sculptor, an aspiring one, maybe. giving my best to be a pro. But I do custom toys and props, paint a lotta model kits, design buildings and interiors, and doodle some graphicworks for work & fun.